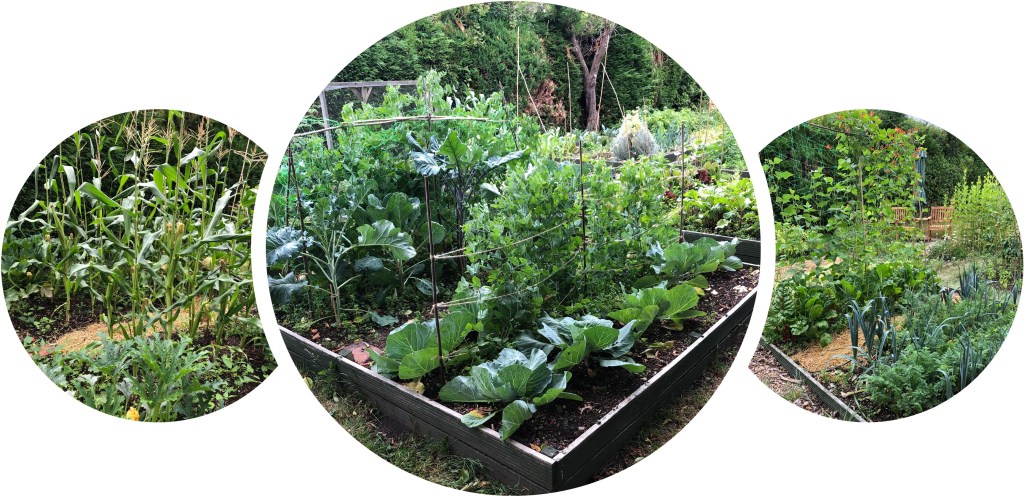

Early in the spring I was beginning to run short of home made compost. At the start of May I decided to take advantage of the first flush of grass and comfrey growing at the end of my garden along with the left over mulched leaves that I had cleared from over-wintered beds to make some “Hot Compost“. This composting method is a fantastic way to rapidly access a source of compost which is both rich in nutrients and bursting with soil microbes, ideal for feeding hungry brassica crops and preparing extracts (what I term protist soup) to give plants a regular boost throughout the growing season.
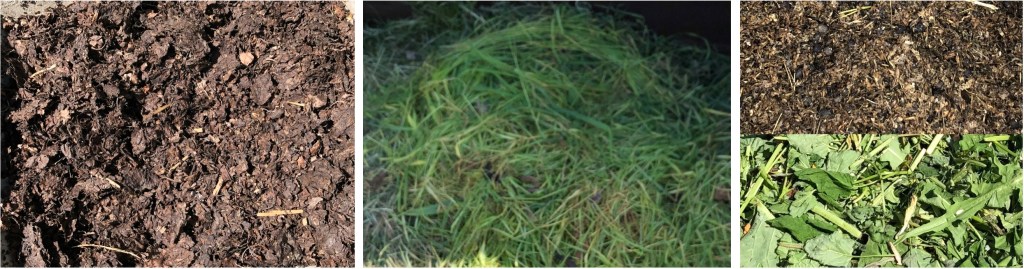
Making hot compost is something of an art. You need a fairly large quantity (at least a cubic metre) of balanced inputs. Roughly a third brown, a third green and a third manure. I discussed compost inputs in some detail in my previous post – The Art of composting; in this case I used dried leaves as the browns, grass cuttings as the greens and a mixture of chopped comfrey, rabbit manure and coffee grounds as the manure components. You also need a fair amount of water (not chlorinated) to ensure the moisture level of the pile is around 80%.
The other thing you need is plenty of human energy! The pile needs to be created in one session, building up alternate layers of brown, green, manure, watering as you go. It then needs to be turned every few days to control the temperature, maintain good oxygenation and to ensure that all of the pile is well mixed and exposed to the higher temperatures at the centre. Overall a pretty good workout!
To enable easy turning I constructed the pile inside a wire mesh cage. The inputs were layered in until I had a completed cylinder of roughly 1 cubic metre. I then covered the whole pile with a canvas bag to keep out light and moisture in. The bag and wire cage could be easily removed to allow ready access to the pile for turning – simple.

Compared to other composting methods, hot composting is pretty quick, taking just a few weeks to yield a usable compost but how do you know when its ready to use?
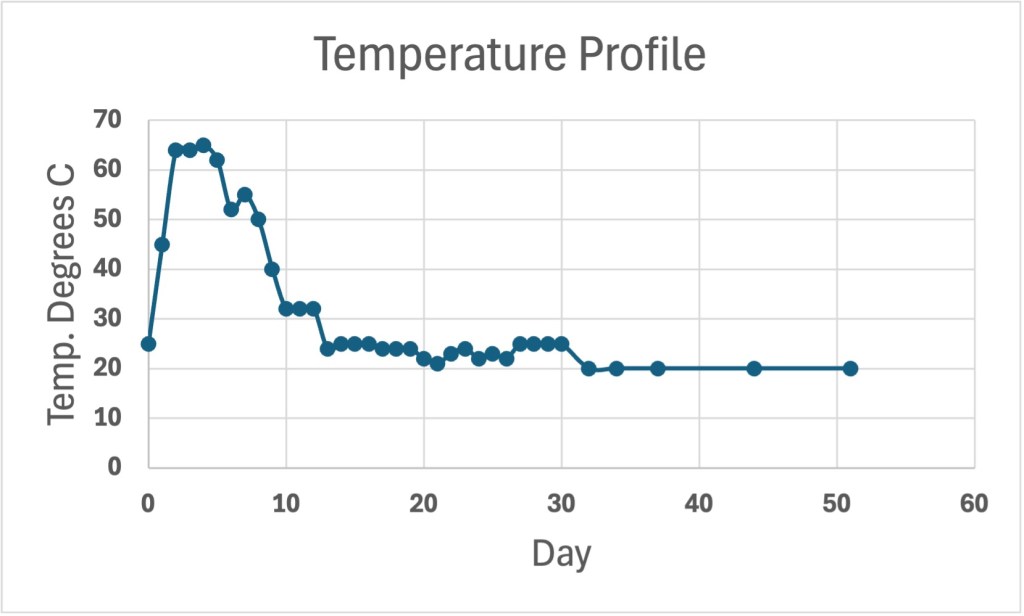
One of the ways is to monitor the temperature of the pile using a compost thermometer [See Box 1]. A well made pile heats up pretty quickly the initiation phase typically takes a couple of days. In my case the pile reached 45C in less than a day and by day 3 was already at 65C and needed to be turned to stop it overheating. This hot phase of higher than 40C can last a few days. After 9 days my pile had started to drop below this level and at 16 days was consistently around 25C, finally cooling to 20C by day 37 and beyond.
Box 1 – temperature profile
There are three distinct temperature phases of the composting process – Mesophilic, Thermophilic and Maturation. The length of time the pile spends in each of the phases depends on its size and the type of inputs used.
Mesophilic – composting is driven by organisms which thrive between 20-40C, typically bacteria, some fungi and larger organisms such as protists and nematodes.
Thermophilic – the activity of the organisms in the mesophilic phase creates heat which drives the temperature above 40C. A new set of organisms which thrive in higher temperatures (40-65C) now takes over and the mesophilic organisms die off or go dormant. At these temperatures pathogenic bacteria and any plant seeds are killed off.
Maturation – as the thermophilic organisms rapidly consume the easy to digest nutrients in the compost the temperature begins to cool again. Once the threshold of 40C is reached the dormant mesophilic organisms start to takeover again. Over time the population of soil food web members increases and the slower job of breaking down the harder to digest compost ingredients begins.
The temperature profile of my hot compost pile is shown in the chart below.
For more detailed information about the stages of the composting process click here.
You can also see visual changes in the compost pile over time. The size of the pile gradually reduces to about a third of the original size and the contents become more and more compost-like in appearance as the plant matter breaks down and the individual inputs become less distinct.

As a general rule of thumb it is recommended to wait for 16 days for the pile to cool and then allow a further week or two before using the compost which at this point will be very fresh and high in nitrogen – ideal for using on hungry crops like brassicas.
But I was curious – at what point would my compost be suitable to use for making an extract (protist soup) and when would it be suitable to use on my beds to feed my brassicas? How was the soil biology profile changing over time?
This is where soil microscopy comes into its own. By taking samples at various points during the lifetime of my compost pile and analysing them under the microscope I was able to get a sense of how the soil food web (SFW) was evolving. For more details on the soil food web see my previous post – Secrets of Healthy Soil.
The detailed results of the microscopy analysis are presented in Box 2. However, there are some key points which I found quite insightful and want to share with you here.
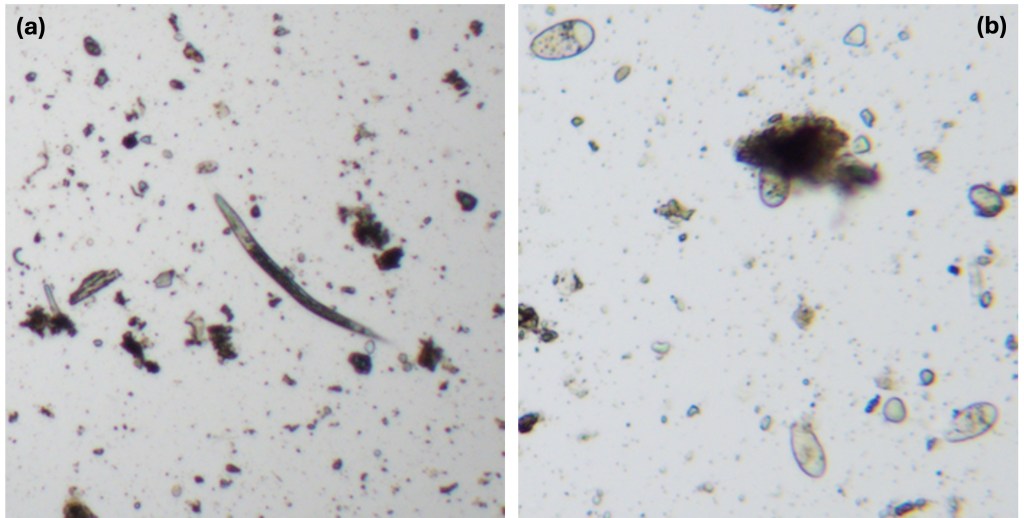
The analysis at day 9, when the hot phase was just coming to an end, showed very high levels of bacteria. This is to be expected as it is mainly bacterial activity that drives the heating of the pile. There were also lots of actinomycetes strands (a type of filamentous bacteria) but only a few protists (mainly flagellates) and no nematodes, this too is not surprising as they don’t like the heat. Fast forward to day 16, now the profile looks quite different. Bacterial numbers are still quite high but we also see nematodes, principally bacterial feeders. The protist levels have also increased with growing numbers of amoeba present.
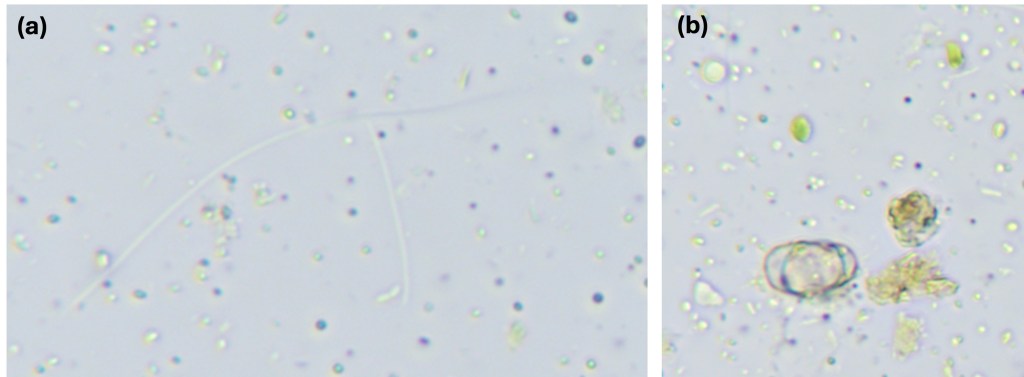
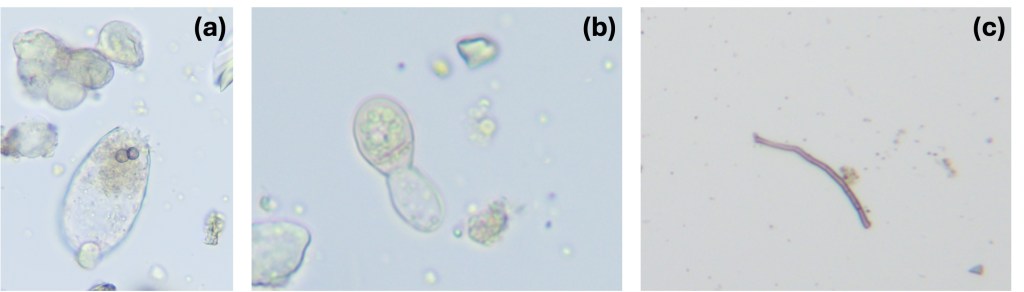
By day 30 the optimal balance of soil food web members appears to have been reached. The nematode population was beginning to evolve further with the presence of larger predatory nematodes as well as the regular bacterial feeders. The protist population was also very vibrant with an array of different types and sizes of amoeba. In addition there were some signs of fungal life with a few fine filaments beginning to emerge from spores. In the final analysis I conducted on day 51, the picture was broadly similar but the nematode and bacteria numbers were showing signs of decreasing as the compost moved into a maturing phase.

So did the microscopy analysis answer my question – when was the compost ready to use either on my beds or to make protist soup?
Based on the results I would say around day 30 was the optimal point to start using the compost – when the soil food web population was high and well balanced. This ties in nicely with the temperature profile when the pile was pretty much back at around 20C. Visually the compost also looked like compost, it felt and smelled like compost too. Gratifyingly my observations were also in line with the rule of thumb guidance mentioned earlier.
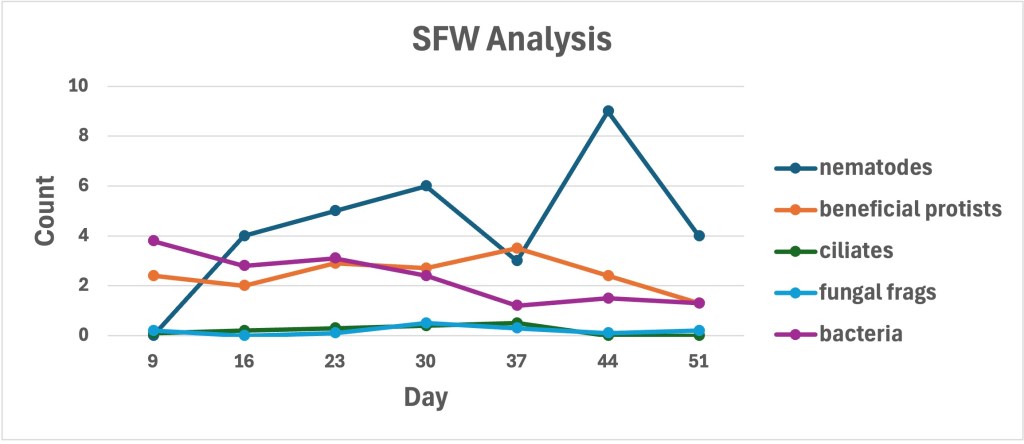
Box 2 – Soil Food Web analysis
- Nematode count – number per drop of sample
- Fungal fragment count – average number per field of view at 100x magnification
- Beneficial Protist (amoeba, flagellate) count – average number per field of view at 400x magnification
- Ciliate count – average number per field of view at 400x magnification
- Bacteria count – estimated number of billions in 1g of compost
This semi-quantitative assessment of soil food web (SFW) populations was carried out according to the following protocol:
A sample of hot compost was taken from the middle of the pile during the turning process. 5g of compost was diluted with 50ml of distilled water (1:10 dilution) and shaken gently. After leaving the debris to settle, a drop of the liquid was taken and placed on a microscope slide. Three drops were analysed for each compost sample.
At 40x magnification the number of nematodes on the whole slide was counted.
At 100x magnification the average number of fungal fragments per field of view (FOV) was estimated by counting the fragments in 10 randomly selected fields.
At 400x magnification the average number of protists (amoeba, flagellates and ciliates) per FOV was estimated by counting the number of each observed in 10 randomly selected fields.
To estimate the number of bacteria present a 1ml sample of the initial 1:10 dilution liquid was further diluted to make up 10ml (overall 100 fold dilution). A drop of this sample was placed on a cell counting slide and the number of bacteria present in each of a series of 10 randomly selected 50 micron squares was counted. These values were then used to calculate an estimate of the number of bacteria present in a 1g sample of the compost.
As a reference point the SFW population of a typical mature compost is as follows [data source – Regenerative Soil Microscopy, Matt Powers, p.181]
- Bacteria – 4-10 billion per g of compost
- Nematodes – 3-7 per drop (beneficial types not root feeders)
- Fungi – average of 1-5 fungal strands per FOV at 100x
- Beneficial protists – average of 3-12 per FOV at 400x
- Ciliates – less than 3-5 per drop
Was all the effort worth it? I am pleased to say my brassicas certainly seemed to like it. I was also able to use the compost to make several batches of protist soup which I applied to my crops every 3-4 weeks across the growing season. Qualitatively the crops look healthier, what I have harvested thus far tastes fantastic. We will have to wait until my end of season soil analysis to get a sense of how effective the application of protist soup has been. I will share this, along with more details on making and using protist soup and related compost teas in my next instalment of the Compost Diary – until then happy growing!